
To set up an email account in Outlook app for Android® devices:
Exchange | POP/IMAP mailbox | OWA-only mailbox | How To Set Up Additional Mailbox
Exchange mailbox
- Enable ActiveSync on the mailbox. By default this is activated. If you experience issues, please contact your company's administrator if they have one. If not, call Southeastern Business Solutions for support.
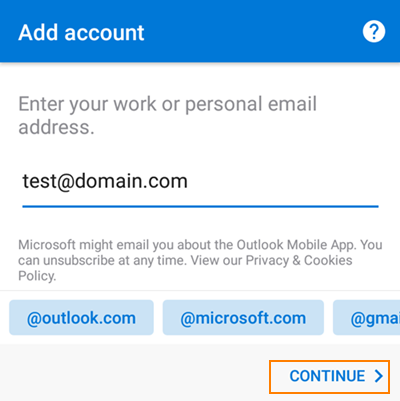
- Open Outlook App, enter your full email address and click Continue.
- The device will try to configure the profile automatically using Autodiscover Record.
If the server address can’t be determined, you will be asked to choose Account Type (then proceed to step 4 of these instructions) or enter the configuration settings manually (it should say "Connect Exchange" - then proceed to step 5 of these instructions, if it says Connect to something else, follow the steps in step 4 note).
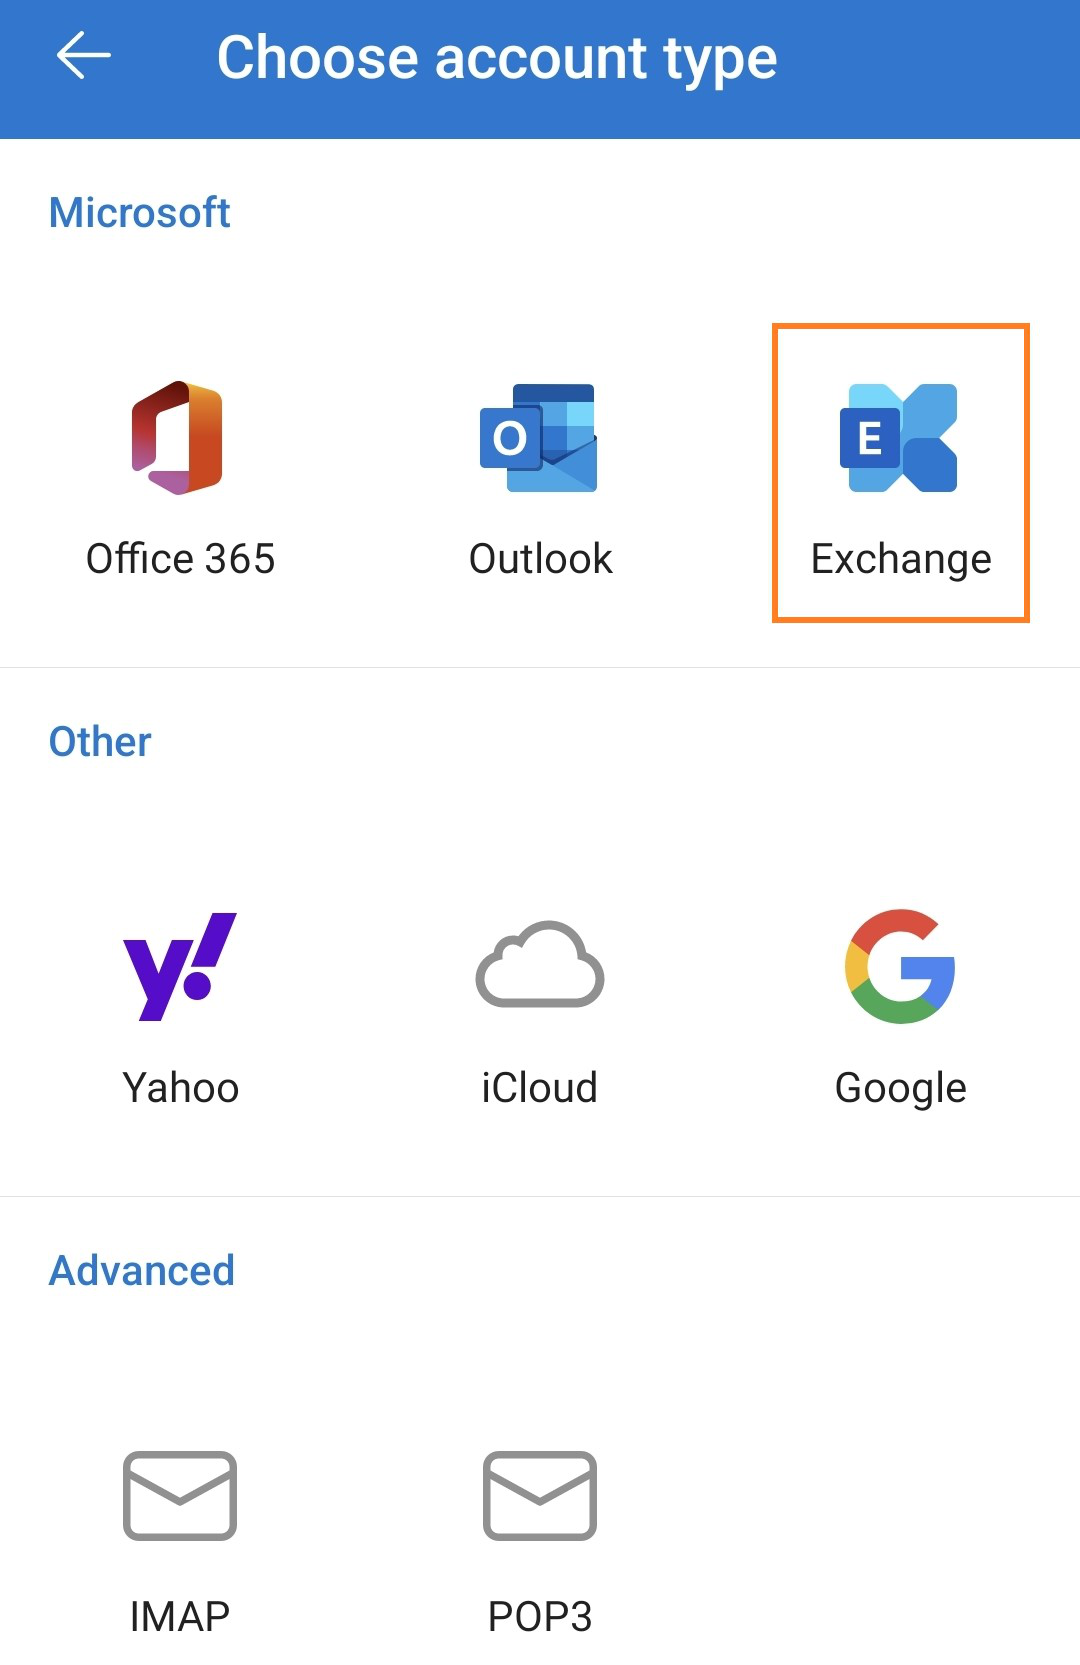
Note: if your mailbox used to be hosted with Microsoft 365 before, you might not be prompted for Account type but instead be prompted for 365 password. In this case, contact your previous email provider to purge your tenant on Microsoft's side (after tenant deletion it's kept on Microsoft servers for 90 more days). - Select Exchange as your account type.
Note: if Exchange is not shown as an account type, proceed as follows:1. Select an available account type (for example, IMAP).
2. Tap Continue.
3. Tap the “?” icon.
4. Tap “Change account type”.
5. Select “Exchange”.
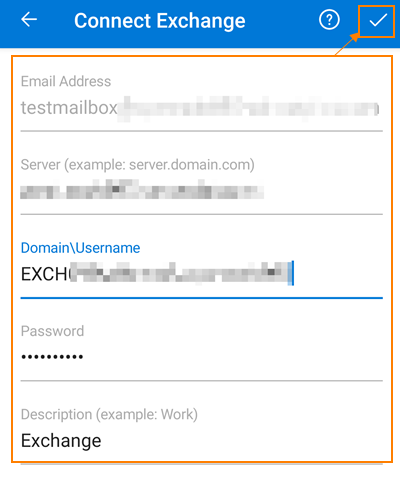
- Fill out all the fields, then tap Check.
Server: your Exchange Proxy setting name. You can find this name in CONTROL PANEL under Services > Mailboxes > click on the user's name > ActiveSync > Serer name page or in My Services > ActiveSync.
Domain\Username: you can either enter your full email address or the ActiveSync domain in ALL CAPS, followed by a backslash (\) and the ActiveSync username. ActiveSync domain and username can be found in CONTROL PANEL under Services > Mailboxes > click on the user's name > ActiveSync page or in My Services > ActiveSync.
Password: enter your mailbox password.
Description: name your new mail account.
Exchange | OWA-only mailbox | How To Set Up Additional Mailbox
POP/IMAP mailbox
- Open Outlook, enter your full email address and click Continue
.
- If you are presented with a choice of account type, select IMAP as your account type. If the app shows "Connect Exchange" instead, proceed as follows:
1. Tap the “?” button in the top right corner.
2. Tap “Change account provider”.
3. Select “IMAP”.
Important: we strongly recommend to use the IMAP protocol instead of POP as POP protocol is considered to be outdated and can cause performance issues for your mailbox.

- Fill out all the fields and tap Check.
IMAP Incoming Mail Server and SMTP Outgoing Mail Server (they are the same): you can find the mail server in CONTROL PANEL under Services > Mailboxes > POP/IMAP Email > View Instructions (if there is no separate field for Port then enter the Port using the format servername:port)
Ports to use:- For connection to the incoming mail server using POP - 995
- For connection to the incoming mail server using IMAP - 993
- For outgoing mail server using SMTP - 587
Security type for Outgoing mail server: StartTLS or TLS.
IMAP Username and SMTP Username (they are the same): your full email address.
IMAP Password and SMTP Password (they are the same): your mailbox password.
Display name: enter the name you want to use in your outgoing emails.
Description: enter the name for your new mail account.
Notes: Outlook mobile app does not support Shared and Public folders.
Exchange | POP/IMAP mailbox | How To Set Up Additional Mailbox
OWA-only mailbox
- Enable ActiveSync on the mailbox. If you experience issues, please contact your company's administrator if they have one. If not, call Southeastern Business Solutions for support.
- Open Outlook, enter your full email address and click Continue
.
- If you are presented with a choice of account type, select IMAP as your account type. If the app shows "Connect Exchange" instead, proceed as follows:
1. Tap the “?” button in the top right corner.
2. Tap “Change account provider”.
3. Select “IMAP”.
Important: we strongly recommend to use the IMAP protocol instead of POP as POP protocol is considered to be outdated and can cause performance issues for your mailbox.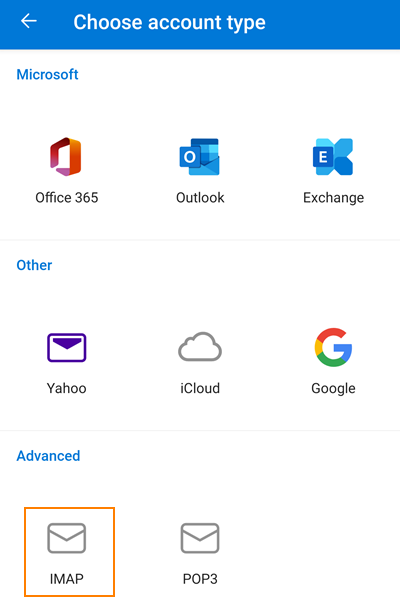
-
- Fill out all the fields and tap Check in the top right corner.
IMAP Incoming Mail Server and SMTP Outgoing Mail Server (they are the same): you can find the mail server in CONTROL PANEL under Services > Mailboxes > Resources > Exchange proxy setting (if there is no separate field for Port then enter it using the format servername:port)
Ports to use: - For connection to the incoming mail server using POP - 995
- For connection to the incoming mail server using IMAP - 993
- For outgoing mail server using SMTP - 587
- Security type for Incoming mail server: TLS or SSL/TLS.
Security type for Outgoing mail server: StartTLS or TLS.
IMAP Username and SMTP Username (they are the same): your full email address.
IMAP Password and SMTP Password (they are the same): your mailbox password.
Display name: enter the name you want to use in your outgoing emails.
Description: enter the name for your new mail account.
- Fill out all the fields and tap Check in the top right corner.
Exchange | POP/IMAP mailbox | OWA-only mailbox
How To Set Up Additional Mailbox
If one profile is already added in Outlook for Android®, Get Started guide will not appear. To add an additional mailbox when a profile is already configured in the application:
- Tap Envelope icon in the top left corner
- Tap Add an Account
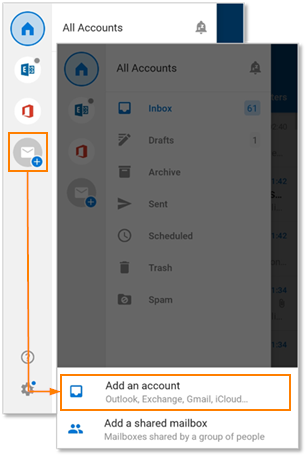
- Proceed with adding a profile using the regular steps above
- The additional mailbox will be listed on the left tab in Outlook for Android®. To switch between mailboxes tap Accounts again and choose a necessary profile

Important Footnote: to protect your account information we cannot publish your Server names in public Knowledge Base. Customers bringing their own administrators will be provided their Server Names upon account setup. If the administrator needs to retrieve it again, you may do so in HostPilot > Home > Exchange servers and settings. If there is turnover and the information is needed again, you may contact Southeastern Business Solutions for your server names and any additional support required.

More Articles Like This One

 Member